Tuesday, June 20, 2017

How to Create a Painted Wood Sign with Glitter Heat Transfer Vinyl Tutorial


SUPPLY LIST:
Wood Sign
Glitter Heat Transfer Vinyl
Vinyl Stencil (I use contact Paper)
Squeegee
Transfer Paper
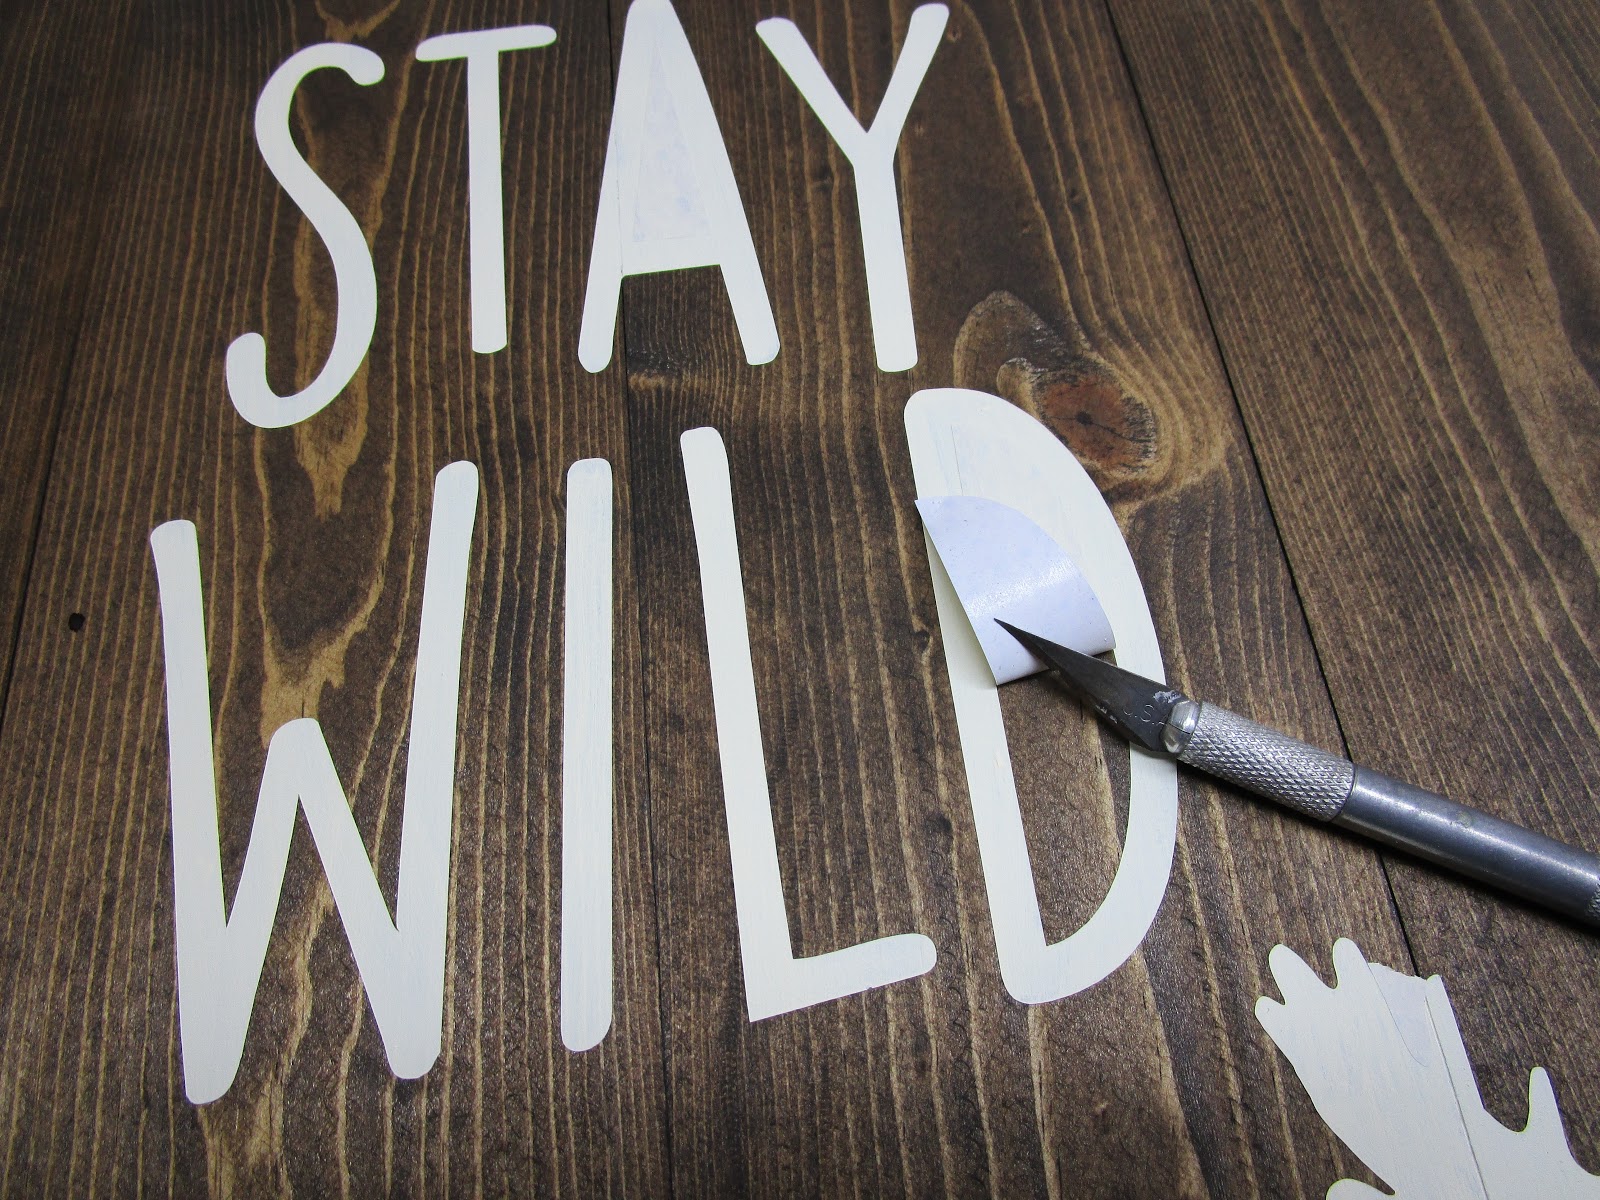
Xacto Knife (or other weeding tool)
Mod Podge Matte
Paint Brush
Paint
Iron (not pictured)
Teflon Sheet (or cardstock or towel) not pictured


Apply transfer paper to the stencil with the squeegee. I use contact paper all the time as it's available at our local store and it's cheap!

Flip the stencil over and carefully peel the grid backing off. Go slow as the vinyl sometimes comes up with the backing. If it does, I press it back down onto the transfer paper and continue to peel the backing off.

NOT PICTURED: Once the stencil is placed on the sign, start in the center and use both hands to press the stencil down and slide your hands out. Continue until all of the stencil is adhered to the sign.  Start at a corner and peel off the transfer paper. Again, go slow as the vinyl can come up with the transfer paper. If the vinyl does come up with the transfer paper, press the vinyl down with your finger or squeegee and continue to peel slowly. Make one more pass with the squeegee to make sure the vinyl is bubble and wrinkle free, especially along the design, as the paint will bleed. 

OPTIONAL: If the design is close to the edge of the stencil, add a border with masking tape. It will prevent any "painting outside the lines". Since this design was not close to the edge, I didn't use any masking tape. See THIS post for details.

After applying the "dream" and "imagine" stencils, I placed the HTV on the sign so I knew where to place the "believe" stencil.


Apply one thin coat of Mod Podge over the design. I LOVE using this as it and creates a "barrier" along the design to help prevent bleeding. If the Mod Podge bleeds under the stencil, it dries clear, so no worries! Let the Mod Podge dry completely before painting.

Paint one thin coat of acrylic paint. I used Sweet Mint. 

Let the paint completely dry before painting on the second coat. I use two coats of paint for a solid paint color. Use only one for a more rustic, brushed look.


Once the paint is completely dry, peel off the vinyl. I start at a corner and slowly peel it off. Using an xacto knife, gently pick up the vinyl left inside of the letters without gouging into the wood. If I happen to gouge the wood, I touch up the stain with a cotton swab. A weeding tool or your finger nails can be used as well.

Put the glitter heat transfer vinyl in place.

Place the Teflon sheet over the HTV.

Instructions from Siser website:

Application instructions (home iron)
• Set iron dial between Cotton and Linen
• Cover design with Kraft paper or non-stick cover sheet
• Place on flat, hard surface (ironing board not recommended)
• Press iron with medium/firm pressure (do not slide iron)
• Press each section of design for 10-15 seconds
• If areas of design lift after application, replace cover sheet
and re-press for 10 seconds
• Peel carrier hot or cold

Application Instructions (heat press)
• Cut in reverse
• Weed excess material
• Preheat garment for 2-3 seconds
• Apply design at 320°F/160°C
• Use medium pressure for 10-15 seconds
• Peel carrier warm

I peel the carrier while warm.


I am absolutely addicted to the glitter vinyl!


Happy Crafting!


Monday, June 19, 2017

DIY Painted Wood Sign Tutorial


SUPPLY LIST:
Wood Sign
Vinyl Stencil (I use contact paper)
Die Cutting Machine (I have a Silhouette Cameo)
Transfer Paper
Squeegee (or credit card)
Mod Podge Matte
Paint Brush
Xacto Knife (or weeding tool)
Acrylic Paint(s)
Masking Tape (optional)

Using the squeegee, apply the transfer paper to your stencil. I use contact paper all the time as it's available at our local store and it's cheap!

Turn the stencil over and carefully peel the grid backing off. Go slow as the vinyl sometimes comes up with the backing. If it does, I press it back down onto the transfer paper and continue to peel the backing off.

Holding the long ends, gently set it over the wood sign to center. The stencil can be easily moved as it's "hovering" over the sign.

Once the stencil is centered, start in the center and use both hands to press the stencil down and slide your hands out. Continue until all of the stencil is adhered to the sign.

Once the stencil is centered, start in the center and use both hands to press the stencil down and slide your hands out. Continue until all of the stencil is adhered to the sign.

Start at a corner and peel off the transfer paper. Again, go slow as the vinyl can come up with the transfer paper. If it does, press the vinyl down with your finger or squeegee and continue to peel slowly.

Make one more pass with the squeegee to make sure the vinyl is bubble and wrinkle free, especially along the design, as the paint will bleed. 
OPTIONAL: If the design is close to the edge of the stencil, add a border with masking tape. It will prevent any "painting outside the lines". Since this design was not close to the edge, I didn't use any masking tape.

Paint a thin layer of Mod Podge over the design. I LOVE using this as it and creates a "barrier" along the design to help prevent bleeding. If the Mod Podge bleeds under the stencil, it dries clear, so no worries! Let the Mod Podge dry completely before painting.

Paint one thin coat of acrylic paint. I used Light Buttermilk. Indoor latex paint works well also. Let it completely dry before painting on the second coat. I use two coats of paint for a solid paint color. Use only one for a more rustic, brushed look. Some colors, especially yellows and reds, tend to need 3 coats.

When the paint is completely dry, peel off the vinyl. I start at a corner and slowly peel it off.

Using an xacto knife, gently pick up the vinyl left inside of the letters without gouging into the wood. If I happen to gouge the wood, I touch up the stain with a cotton swab. A weeding tool or your finger nails can be used as well.


I brush on a coat of sealant and let it dry overnight.

Happy Crafting!


Sunday, June 18, 2017

Heat Transfer Glitter Vinyl on Canvas Sign Tutorial


SUPPLY LIST
Canvas
Acrylic Paint(s)
Paint Brush
Heat Transfer Vinyl (I used black and glitter)
Die Cutting Machine (mine is a Silhouette Cameo)
Xacto Knife (or wedding tool)
Iron
Teflon Sheet (not pictured)
Scrap Wood for under Canvas when ironing (not pictured)


Paint your canvas with Acrylic Paint. I used Antique White.

Let the paint completely dry.

I used a scrap piece of plywood and cut to size so it keeps the canvas solid when ironing on the HTV.


I cut the vinyl with my cameo and weeded with my xacto knife. Remember to cut the words in REVERSE!

Arrange the vinyl on the canvas. 

Lay down the Teflon sheet (card-stock, Kraft paper or a towel are other options)

Instructions from Siser website:

Application instructions (home iron)
• Set iron dial between Cotton and Linen
• Cover design with Kraft paper or non-stick cover sheet
• Place on flat, hard surface (ironing board not recommended)
• Press iron with medium/firm pressure (do not slide iron)
• Press each section of design for 10-15 seconds
• If areas of design lift after application, replace cover sheet
and re-press for 10 seconds
• Peel carrier hot or cold

Application Instructions (heat press)
• Cut in reverse
• Weed excess material
• Preheat garment for 2-3 seconds
• Apply design at 320°F/160°C
• Use medium pressure for 10-15 seconds
• Peel carrier warm

Peel the carrier sheets off. I peel them off while warm.

I LOVE THE GLITTER!


And that's it! 
Here are a few more with different acrylic paint colors and glitter HTV.


Happy Crafting!